Pages

Showing posts with label main entree. Show all posts

18.4.11

Rani's Greek Chicken Kabobs

Here's another great Greek chicken recipe to add to our collection, compliments of Rani (you may recall his veggie soup in February).


[Prep: 15min + overnight / Cook: 10-15min]

Ingredients

- 2 chicken breasts
- about 1-1.5 Tbs olive oil
- juice of 1/2 lemon
- lemon zest from 1/2 lemon
- 1.5 Tbs fresh chopped oregano (and he means fresh)
- 1 Tbs fresh chopped basil
- 1 Tbs chopped parsley
- dash of salt and pepper
- stack of metal or wooden skewers


Steps
  1. Cut chicken into 1 inch cubes.
  2. Mix all other ingredients in a large plastic bag.
  3. Add the cubed chicken to the bag and toss to coat. Let marinade in the refrigerator as long as possible (overnight is best).
  4. Skewer the cubes and grill over high heat. You'll need to cook them for about 3 minutes on each side, turning 1/4 turn 4 times.
  5. Ready to eat!
[Serves 2]

Notes
  • Rani recommends using a cast-iron pan to pan-fry/grill the skewers. Cast-iron pans get really hot and yield really juicy kabobs.
  • Be cautious when using wooden skewers because they will scorch and burn. It's always a good idea to let wooden skewers soak in water before cooking.

Suggested Sides
  • Pita bread with hummus dip
  • Couscous 
  • Spinach salad with feta cheese, tomatoes and olives

25.3.11

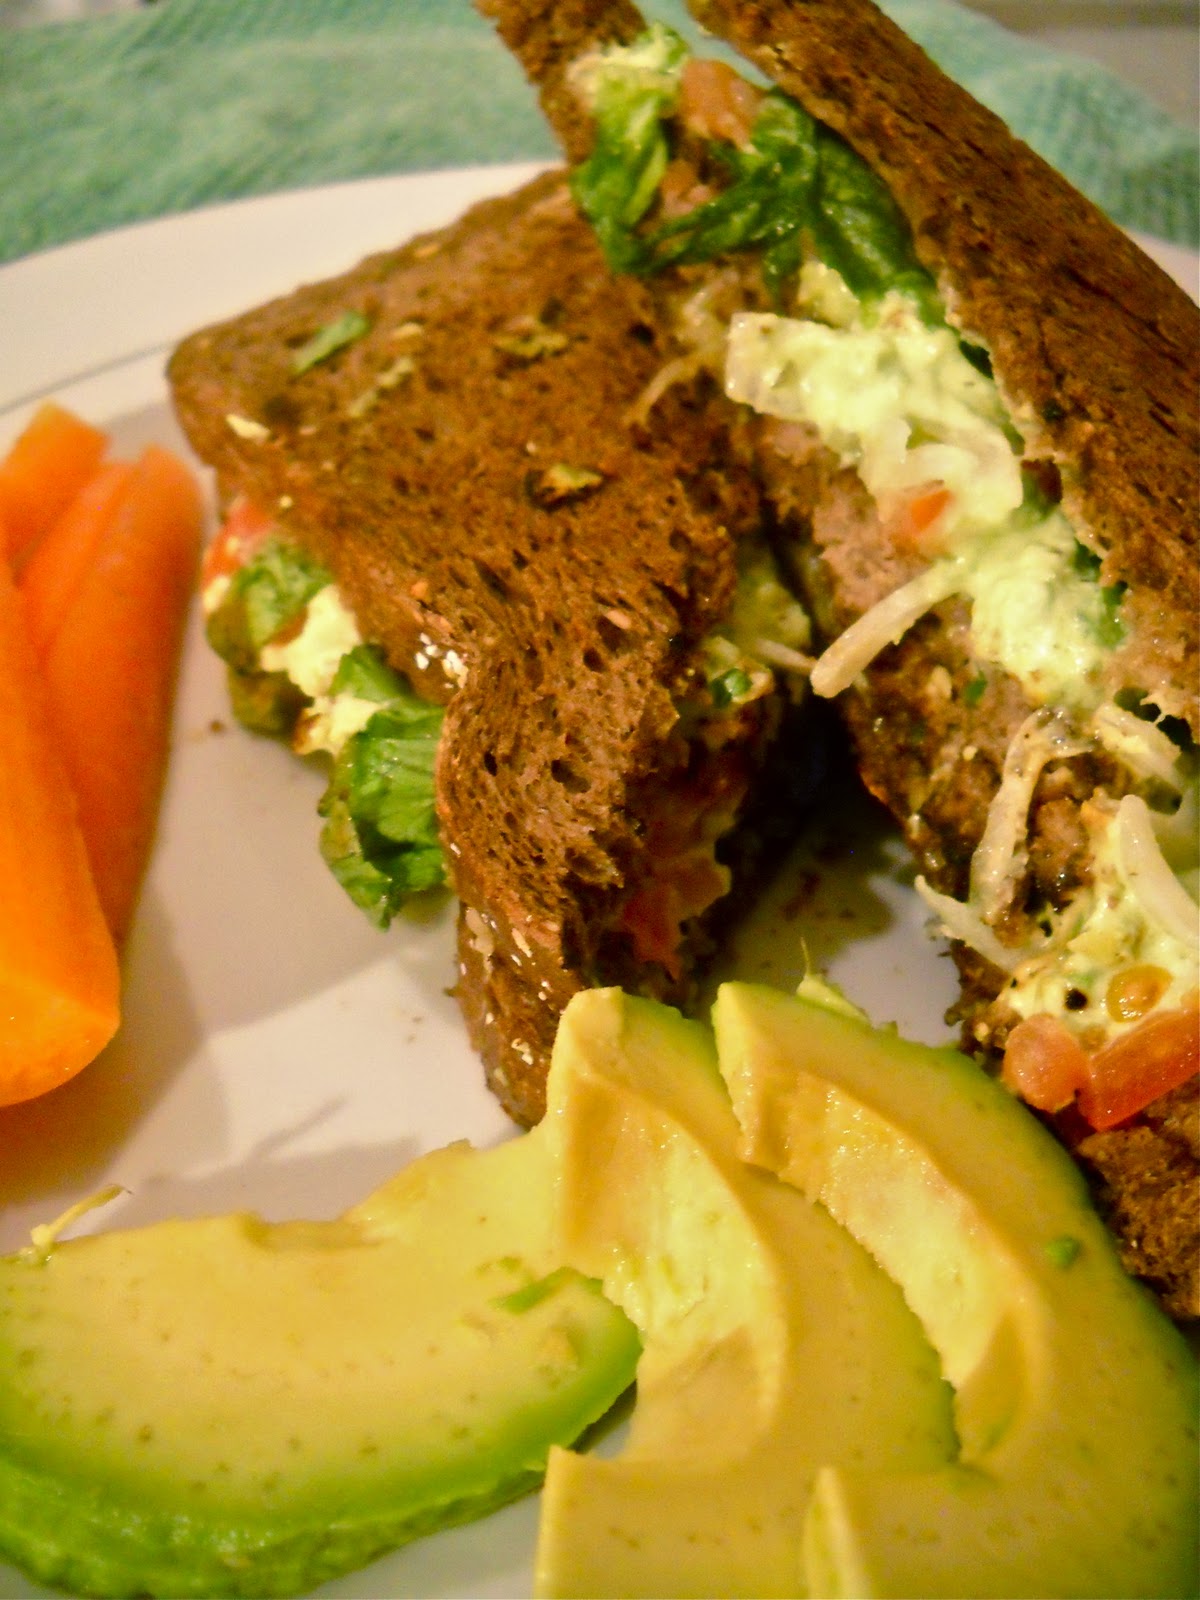
Avocado Melt

A simple avocado sauce gives a little gourmet edge to this otherwise ordinary sandwich. Load it up with plenty of veggies and this quick and simple burger is practically a meal!

And, as if to make up for last week, this sandwich turned out nice and ugly...


[Prep: 10min / Cook: 15min]

Ingredients

- 1/2 lb (250 grams) ground turkey or chicken
- 4 slices whole wheat or rye toast
- 1 small/medium avocado
- half a 3oz box of cream cheese (75 grams)
- a hefty dash of garlic powder (about 1tsp)
- leafy lettuce (butterhead, romaine, etc)
- 1 tomato
- 1/4-1/2 an onion
- slice of swiss cheese
- olive oil


Steps
  1. Separate the meat into two balls and flatten in out into round patties, as thin as possible.
  2. Put a touch of olive oil in a frying pan and grill the patties over medium-high heat for about 5 minutes on each side. Add a slice of cheese to each when nearly finished cooking.
  3. While the meat cooks, slice the tomato and onion. Separate a few leaves from the lettuce, rinse and shake dry.
  4. Cut the avocado in half, seed and peal. Mash the avocado in a small bowl with the cream cheese and garlic powder.
  5. When the meat is finished, stack the patties on the bread with a good serving of lettuce, onion and tomato and top off with the avocado mixture.
  6. Rinse and dry the frying pan. Return the complete sandwiches to the pan, grill for a few minutes on each side and squish with a spatula.
  7. Ready to eat!
[Serves 2]
Sauce inspired by Taste of Home: Simple & Delicious 
Zesty Garlic-Avocado Sandwiches

Notes
  • Once upon a time when I still lived in the US, we had a George Forman Grill. This would be a great little sandwich for a George Forman or a sandwich maker.
  • Like with guacamole, a very ripe, squishy avocado works best to make this sauce. My avocado was not so squishy, but the combination mixed up quite well when I microwaved it at 10 second intervals to soften it up.
  • Though this sandwich is loaded, you may hesitate to call it a full meal. I refuse to serve more carbs with a sandwich, so I served mine with raw, quickly sliced carrots...which I was able to work into the cooking time specified.


Variations
  • Those with a keen eye probably noticed that the sandwich pictured was made with beef. Ideally this would be made with ground turkey or chicken, but I had neither at the grocery store this week. For the record, it still tasted lovely with beef.
  • I did, however, want to add bacon and mushrooms after I tasted it. Mushrooms would be a cinch, but bacon obviously would add a lot of cooking time (and not be very healthy...). I have seen bacon cooked in a microwave, though...
  • For the vegetarians out there, this sandwich was originally made the same way, minus the meat. But I say, add a big 'ole portobello mushroom in place of the meat. Yummy.

28.2.11

Green Pea Soup

This is not quite the easiest soup I could post, but OH MY GOSH is it good. Split pea soup is my absolute favorite Dutch food- even more than cheese and baked goods. There is something just so brilliant about the blend of peas and pork. Plus its nickname is 'Snert' and what could be better and more appealing than a green blob called Snert?

Dutch split pea soup-- its full Dutch name being Erwtensoep --is a slightly tricky little delicacy to make. It involves boiling split peas with various cuts of pork (namely a big piece of bone-in ham or pork shoulder), taking out the pork, putting in vegetables, possibly pureeing and then putting the meat back in again. Certainly worth it, but I've simplified the process a bit and was very, very happy with the results. Unfortunately, though, I've just ruined Snert out-of-a-can (quite decent as it is) for myself probably for life now.

Anyway, the biggest change I've made is substituting real peas for split peas. I've researched this quite intently and while dried split peas are by far the most popular way to make soup, there's really just a few simple pros and cons to each...and for me real peas seemed easiest.

The biggest advantage to dried split peas is texture. Apparently they don't have skins and are a bit more starchy, and so more easily cook down into the appealing consistency of the soup. However, split peas should be soaked for a few hours (not necessary, but helps) and give off a frothy 'scum' in the soup that needs to be skimmed off early on in the boiling process. I'm also uncertain as to their availability outside of Holland.

Canned/frozen peas are just a bit more speedy and I didn't see any scum that needed skimming. The biggest issue is their shells which don't break off or let the peas break down easily during cooking. There are a couple ways to combat this (which I'll discuss later), but mine tasted just fine lumpy, ugly shells and all.


[Prep: 20min / Cook: 1.5 - 2hrs]


Ingredients

- 15oz can of green peas (400 grams)
- 2 1/2 cups / 500mL water
- 1/4 lb (125 grams) thick-cut bacon
- 1 pork chop [optional]
- 1/4 of a celeriac (celery root)
- 1 leek
- 1/2 white onion
- 2-3 carrots
- 2 small/medium white or yellow potatoes
- smoked country sausage (kielbasa, rookworst, etc)

Steps
  1. Briefly strain the peas and bring them to a boil in the water.
  2. Meanwhile, chop up the bacon and pork chop and throw it in with the peas.
  3. Chop up about 1/4 of a celery root. It'll be about a cup's worth once chopped. Slice the leek all the way down to the white base and slice half an onion. Add all to the soup.
  4. Let the soup cook for about an hour, stirring fairly frequently (about every 10 min). Crush the peas a bit with the spoon if you'd like.
  5. Slice the carrots, cube the potatoes and slice as much smoked sausage as you'd please. Add all to the pot and cook for about 30min - 1hr more, stirring every 10 min until the soup reaches your desired thickness/consistency.
  6. Ready to eat!
[Serves 2 for dinner or 2 twice as a side]
Notes
Celeriac
  • All the ingredients-- including dried split peas if I had been interested --are quite easy for me to find this time of year in Holland but may or may not be difficult elsewhere. If you can't find a celery root, you can use celery shoots, the flavor just won't be as strong. Make an effort to look for the root, though. Not only is it awesomely big, but it smells lovely.
  • Traditional split pea soup gets its great flavor from ham/pork with the bone in. Using bacon instead really helps with the flavor, but its worth trying with a bone. Since it's a winter soup, keep an eye out for the big family ham around the Holidays and instead of letting anyone throw the bone away, package it up and freeze it. Later you can throw it in this soup and just discard the bone when you're read to eat!
  • As mentioned, the biggest issue with using real peas and not dried split peas is that they don't break down as well in the soup. It tastes just fine but maybe doesn't look as appealing (b/c green goo looks appealing to begin with...). If you really want your real pea soup smoother, you can try one of these methods

    • Puree the peas in a blender/food processor either before you start, or after that first hour of cooking, before you add in the veggies & sausage (the meats, celeriac and leek will have cooked down quite a bit). 
    • OR you could pan-fry the peas and bacon first. Peas really squish down when you pan-fry them and it could actually cut down on your cooking time as well. Because the meat & pea flavors will have already melded, you can cut straight to the veggie & sausage hour after pan-frying.
  • They say this soup tastes better after sitting overnight in the fridge. Apparently it thickens and the flavors meld more. I can't know for sure-- my entire batch seemed to miraculously disappear last night --but I'd believe the Dutch!

27.2.11

OntheFly Hot and Sour Soup

When you see one of my recipes specifically labelled with "OntheFly" then you know that it is a true Megan Danna original on-the-fly creation. In this instance, I do this not to pat myself on the back for inventiveness in the kitchen but rather to distinguish that though this recipe mimics, it does not compare to the wonderfulness that is a true Schezwan hot and sour soup.

Real hot and sour soup is basically vegetarian (if you take egg) with tofu, bamboo shoots and bean sprouts or can be seafood-based with shrimp/prawns. It also uses cornstarch to thicken the broth, which- after a year of experimenting with it -I've decided is just too much trouble to even keep in my kitchen. If you've never had the pleasure of real hot and sour soup, take this recipe as a homemade introduction, but definitely keep an eye out for it next time you have Chinese!

What was so fun about this recipe was that on an otherwise distressful night where I had somehow managed to forget to plan dinner and found myself with just two pork chops and a dare by my boyfriend to turn them into soup, I was struck by inspiration and was somehow able to throw this together entirely with staple ingredients in my kitchen. Which makes this awesome spicy soup entirely within anyone's grasp!


[Prep: 10min / Cook: 30min]

Ingredients

- 2 pork chops
- 2 1/2 cups (500mL) chicken broth / water with stock cube
- 1 Tbs soy sauce
- 1 Tbs white vinegar
- a hefty dose of chili powder (abt 1 Tbs)
- black pepper (abt 1 tsp)
- 1 tsp Sambal chili paste OR chili flakes (the pizza topping) 
- 2-3 medium carrots
- 2-3 white mushrooms
- 1/2 an onion
- 2 eggs
- a tiny chunk of ginger (abt 1/2 inch of the root)
- 2 servings cooked rice
- a dash of coriander

Steps
  1. Bring the broth, soy sauce, vinegar, chili powder, pepper and chili to a boil.
  2. Meanwhile, cut the pork chops into thin slices and add to the broth.
  3. Cut the carrots and mushrooms into long, thin-ish slices (julienne if you will) and chop the onions and ginger as much as possible.
  4. Add the veggies to the pot, turn down the heat and let simmer for about half an hour.
  5. When the half hour is finished, crack the eggs in a small bowl and scramble. Turn the heat off the soup, drop in the egg and lightly swirl it around a bit. Serve over rice or with the rice on the side and garnish with a dash of coriander.
  6. Ready to eat!
[Serves 2]
Notes
  • You don't have to use pork, of course. You could go without meat or substitute shrimp instead. If you do use pork, though, try to get have it as thin as possible. Here they have great thin "schnitzel" cuts of pork that all I have to do is quickly chop into a few pieces. Otherwise, you can get a couple thick pork chops and cut it into thin strips.
  • My proportions are a bit on the spicy side. You may want to start lighter.
  • I realize ginger is probably not a "staple" for most people. It's not really essential, but it lends a good balance to the soup. Ginger is cheap and lasts for weeks, have fun and grab a root!

30.12.10

Blackened Flank Steak and Sauteed Spinach

You may finally be finishing up your Christmas ham left-overs, but there's still time to sneak in one more red and green meal before New Years- that is, if you're a fan of red meat :)


Blackened Flank Steak

- 1lb flank steak
- Worcestershire sauce
- garlic and onion powder
- cajun seasoning or chili powder
- black pepper
- olive oil

1.  Moderately tenderize your steak with a hammer or by vigorously stabbing it with a fork on each side.
2.  Drizzle Worcestershire sauce on both sides of the steak and spread with a fork to coat fairly evenly.
3.  Lightly sprinkle with garlic, onion and cajun/chili powder, then coat with a hefty dose of black pepper.  (both sides)
4.  Meanwhile, heat a skillet over high heat and add oil to the pan.  When the oil is just about to smoke, throw in the steak and scorch each side for about a minute.  Turn the heat down to medium and continue to cook for 5 minutes on each side (medium rare) or until the steak reaches your desired level of doneness.
5.  Cut in long slices against the grain and you're ready to eat!

[Serves 2]


Notes
  • I have trouble finding flank steaks in the US anywhere but Super Target.  This may be an anomaly, but if not, a skirt steak or a flank steak masquerading as a "London broil" will also do.
  • A fillet knife makes slicing this steak a breeze, but I've found that a big bread knife is pretty good for slicing beef too.
  • I often find when blackening that a ton of my pepper and spices come off in the pan and burn up.  If you dust some more pepper while it's cooking, you'll still have a mess, but you won't lose too much flavor.  Some other ways I've seen to keep better hold of your spices include:
    • Rubbing the spices into the meat
    • Lightly coating the meat in oil first 
    • Mixing oil/butter in a bowl with the spices before coating, then using the same mixture to baste the meat throughout cooking
    • Coating the meat in raw egg white before seasoning


Sauteed Spinach

- 2-4 cups fresh, raw spinach leaves
- 2 cloves of garlic sliced / garlic powder / garlic granules
- grated parmesan cheese
- olive oil

1.  Heat a skillet over medium-high heat.  Add about a tablespoon of oil and season the oil with the garlic.
2. Throw in the spinach and saute for no more than 5 minutes, keeping the spinach moving in the pan with a spatula.  Just as all the spinach is wilting, sprinkle lightly with parmesan cheese and remove from pan.
3.  Ready to eat!
[Serves 2]

Recipe adapted from Quick and Easy Sauteed Spinach by Denee on Allrecipes.com

22.12.10

Holiday Ham and Cheesy Spinach Potatoes


One of my big guilty pleasures in life- ranking right up there with a mild soap opera addiction -is a deep fondness for the blue box, good old Kraft macaroni and cheese.  On those rare occasions when I find myself cooking for one, it's what I nearly always turn to.  What meat to pair with that lovely dish was always the challenge, though, until one evening I made a miraculous discovery at Singapore's Cold Storage: fully cooked "ham ends" in the pizza topping section [!?] in 400-500 gram packages for only about $2.  I threw those chunks of ham in a skillet and heated it up with a some honey, white & black pepper and a bit of soy sauce and WOW.


People may frown at serving chopped "ham ends" and macaroni and cheese for Christmas dinner, so I've adapted and tested the recipe on a whole ham and paired it with some cheesy spinach potatoes for the Holidays.  Though if you ever get the chance (or find yourself with left-over ham at some point), I do strongly recommend preparing it the original way...


Megan's Holiday Ham

- a squeeze bottle of honey
- about 1/4-1/2 cup of soy sauce
- lots of black and white pepper
- one fully-cooked ham for two* (preferably spiral cut!)
*small hams are hard to find and it's nearly impossible to get one that's less than a pound.  so be prepared for this meal to serve 4, or have plenty of left-overs for 2!

1.  If you have time, marinade the ham for a few hours or over night in a plastic bag in the refrigerator.  Put the ham and soy sauce in the bag and squeeze as much air as possible out of the bag.
2.  Preheat the oven to 350F and place the ham on a large piece of aluminum foil inside a baking dish.  If the ham is not spiral cut, cut a deep diamond pattern all over the ham, about 1/4" thick.
3.  Fold up the sides of the foil to form a bowl.  If you have a fully-cooked ham, pour the soy sauce from the marinade bag back over the ham (otherwise, throw out the marinade and use fresh soy sauce).
4.  Sprinkle the ham liberally with both peppers then squeeze honey on top.  Spread out the honey to coat the ham with a brush or spoon and be sure to get BOTH the honey and pepper into the individual spiral slices or cuts.
5.  Close the foil over the top of the ham and bake for 45min-1hr.  Every 15 minutes or so, open the foil and spoon some soy sauce juice back over the ham to baste it.  You may also want to add more honey and pepper halfway through cooking.
6.  Ready to eat!

Notes
  • The standard rule-of-thumb for ham baking times is 20 minutes/pound.  However, for the sake of cooking in the flavor, I usually cook even tiny hams for an hour.
  • If you have time and your ham will fit, slow cooking it for about 4-6 hours is a great way to really cook in flavors to your ham. 

Variations
There are countless great ways to flavor a ham.  A classic Holiday ham usually involves poking cloves into the diamond cuts on the ham, but here are some great baste/glaze combinations to try:
  • baste: apple cider / glaze: brown sugar & honey
  • baste: beer / glaze: pineapple juice & brown sugar
  • baste: balsamic vinaigrette / glaze: honey or dijon mustard
  • baste: orange juice and bourbon or whiskey / glaze: molasses & honey
  • baste: root beer or Dr Pepper / glaze: brown sugar, ketchup & steak/Worcestershire sauce


Cheesy Spinach Scalloped Potatoes

- 2-3 red/new potatoes
- about 2 cups fresh spinach
- 1 cup shredded cheddar-based cheese blend
- 1/2 cup of milk
- half an onion
- bacon bits
- butter/margarine


1.  Preheat oven to 350F and melt a little butter in a small/medium skillet.
2.  Slice the onion and heat in the skillet until soft and just starting to carmalize.
3.  Wash the potatoes and cut into thin slices. Line the bottom of a small casserole/baking dish with 1/3 of the potato slices.  Layer with spinach and top with 1/3 of the cheese, onions and bacon bits.  Repeat for 2 more layers.
4.  Pour the milk over the top of the casserole and bake for 45min-1hr.
5.  Ready to eat!

[Serves 2]

Notes
  • You can heat the milk with some butter in the skillet before pouring it over the pan or substitute buttermilk, full cream, whipping cream or softened sour cream for the milk.
  • I've made this dish twice over the past week and have finally made a decision on fresh vs. frozen spinach.  Frozen spinach is a mess!  And a whole lot of trouble.  When I used fresh spinach on these the first time around, it stacked pretty high at first, but the spinach cooked down and the top layer had a nice crispiness to it.  It fresh spinach for me from now on...
Recipe adapted from Spinach Potatoes by erinsanders on Allrecipes.com

20.12.10

Fresh and Festive Salads

Tomatoes aren't the only way to spruce up a salad these days.  Mix in fresh red fruits with your salad greens to bring a little holiday cheer to your dinner table.  Then, add a little left-over ham, chicken or turkey to make your side salad a meal!


Strawberry Pecan Delight

- salad greens blend (try mixing and matching: spinach, romain, red-tipped lettuce, arugala and endive)
- sliced fresh strawberries
- chopped pecans
- sunflower seeds
- grilled chicken pieces or chunks


1.  Add all ingredients to a large, seal-able bowl.
2.  Drizzle with a light vinagrette dressing such as red wine or balsalmic.
3.  Seal the lid to the bowl and shake until well-mixed.
4.  Ready to eat! 


Cran-Apple Salad

- salad greens blend (try mixing and matching: spinach, romain, red-tipped lettuce, arugala and endive)
- crumbled blue cheese
- dried cranberries
- red and green apples, cut into chunks
- chopped walnuts
- turkey (left-overs in chunks or deli slices cut into strips)

1.  Add all ingredients to a large, seal-able bowl.
2.  Drizzle with balsalmic vinagrette or a quick mix of lemon juice and light mayonnaise.
3.  Seal the lid to the bowl and shake until well-mixed.
4.  Ready to eat!


Other fun and fruity ways to bring a little red to your holiday salad:
  • cherry tomatoes
  • grapefruit
  • raspberries
  • fresh cranberries
  • red grapes
  • red nectarines
  • raisins
  • dried or fresh cherries

30.9.10

Tortilla Chicken Jumble!


Yay, funny names.

-    a little over ½ lb (350) grams of chicken fillets OR 2-3 chicken breasts
-    6-8 flour tortillas
-    1 packet of instant tomato soup OR ½ can of tomato soup
-    ½ cup (120mL) of your favorite salsa
-    shredded cheddar or Mexican cheese blend (amount as desired)


1.   Boil the chicken for 30 
      minutes.   
2.   While the chicken cooks, slice the tortillas pizza-style into about 8 pieces each.  (speed tip: you can do them all at once)
3.   Heat up a pan and toss the tortilla slices in.  Heat them in the pan until they get a bit hard and crispy (see picture). 
4.   Strain the water from the chicken.  Use a large wooden spoon to break up the chicken.  If you mash and stir the chicken with the spoon, you will find that it shreds quite easily.
5.   Prepare the instant soup if necessary.  Add the soup and salsa to chicken, stirring with spoon between additions so as to shred it a bit more.  Add the tortillas and cheese and mix again.  Heat the whole mixture for just a few minutes until the cheese melts. 
6.   Ready to eat!
[Serves 2]


Notes:
      o   “Crisping” the tortillas just helps to keep the mixture from becoming too soggy.  Thus, I only crisp about half of them.  You can do as many or as little as you like.
      o   This dish truly represents the messy & ugly but tasty principle of my cooking [hence the avocado “garnish” above].  But believe me, it’s much better than it looks.
      o   This is another meal that keeps quite well, so make more and have left-overs :)

Suggested Sides:
o   Cut-up an avocado with a dash of seasoned salt
o   Slice up some fresh kiwi or oranges
o   Pan-fry some corn and cherry tomato halves.

Variations:
o   My mom would make this a meal-in-one by adding shredded lettuce with chopped onions and tomatoes on top. [To that end, chopped onions would be a great addition to the mixture itself]
o   I have not had access to corn tortillas for YEARS, but they would probably be even better!
o   If this dish is just too unbecoming to you and you have the patience, you can make Tex-Mex lasagna.  Make the entire mixture the same way, but do not crisp nor add the tortillas.  Instead, line a small casserole dish (a 2qt round dish would be great) with the tortilla slices and add about 1/3 of the mixture on top.  Make 2 more layers and sprinkle the top with some extra cheese.  Then, bake in the oven for a few minutes until the cheese melts. 
o   Tex-Mex lasagna and Italian tortillas in the same month.  
     I must suffer from cultural confusion.

22.9.10

Italian Enchiladas

This was the result of one of my favorite experimental cooking scenarios—I got to the grocery store and they did not have what I wanted (in this case, cannelloni and a can of Alfredo sauce).  Having no idea how the tortilla substitution would work out, I took the first bite with my eyes closed.  Suffice it to say, this is one of the first meals in a very long time that earned me a big, sloppy kiss on the cheek.  Enjoy!
-       2 or 3 chicken breasts
-       creamy pasta sauce mix (Alfredo, Four Cheese or Carbonara)
-       1 packet instant tomato soup powder or ½ can of tomato soup
-       ~ 500 mL of milk
-       butter/margarine (if needed)
-       1 clove of garlic or garlic powder
-       flour tortillas
-       shredded parmesan, mozzarella or an Italian blend

1.   Make some shredded chicken.  You can do this one of [at least] three ways, depending on your preference or time frame.
            -       Boil the chicken on the stove for about half an hour.  Drain the water and the               chicken should pull apart using two forks.
            -       Boil the chicken on the stove for about an hour.  Stir it frequently and                           mash/jab at it with a wooden spoon to help it fall apart in the water.  Pour                   the contents through a strainer and put the chicken back in the pot.  You                     should be able to continue mashing it with a spoon for just about a minute                   more and it will all pull apart. 
            -       Put the chicken in a slow cooker for 2-3 hours on high or 4-5 hours on low.                     When it’s done, it will be falling apart on its own and some gentle spoon                       mashing or fork pulling will get the job done.  **If you use this method, I                       strongly recommend cooking the chicken in the sauce from step 2 while it’s in               the slow-cooker
2.   Prepare half of the pasta sauce mix according to the package directions—usually this involves adding about 250 mL of milk and some butter.  Before it boils, however, add the tomato soup mix.  
3.   Pour your newly created tomato cream sauce over the chicken and mix to coat.
4.   Back in the same pot, prepare the other half of the pasta sauce along with a hefty dose of garlic. 
5.   Divide the chicken across any number of tortilla shells depending on your preferred meat/tortilla ratio and roll ‘em up.  (If you’re unsure, just use 2 shells/person and split the meat in fourths)
6.   Pour the second batch of cream sauce directly over the top of the enchiladas and sprinkle with shredded cheese. 
7.   Pop in the microwave for 30 sec – 1 min until the cheese is melted.
8.   Ready to eat!
[Serves 2 very hungry people]


Notes:
o   Pasta sauce mixes come in various sizes.  I used 1 packet of [Dutch] Knorr Carbonara Macaroni that was about 40 grams and called for 500 mL of milk.  In the US and Singapore, I always used McCormick packs, which were about 20 grams and called for 250 mL of milk.  Use whichever packets you prefer, but obviously, if you use the smaller packets, use two.
o   Splitting the sauce in half really isn’t necessary, I just wanted the inside and outside to be a bit different.  For a super simple recipe, prepare all the sauce at once, mix half with the meat and pour the other half on top of the shells. 
o   For an even simpler recipe, use a can of your favorite pre-made creamy pasta sauce and combine it with the [prepared] tomato soup.  I won’t judge you, I promise.

Suggested Sides:
o   Grill/pan-fry a mix of carrots and broccoli (with a dash of garlic and salt)
o   Mix up a spinach, tomato and red onion salad with a splash of balsamic vinaigrette
o   Serve up some big slices of Italian bread (like Focaccia) with a plate of olive oil and vinegar/black pepper
o   White wine ;-)


Variations:
      o   If you’re daring, you can make your own tomato cream sauce by mixing tomato sauce/paste with some whipping cream and parmesan cheese.  The ratio is really up to you, but typically equal parts tomato and cream [or slightly less cream] is a good place to start.  You can throw in garlic, basil, etc as desired. 


o   I really recommend adding some spinach along with the chicken.  Just rinse, break the stems off and throw it in with the sauce while it’s cooking.
o   You can dress up the chicken filling even more by chopping up some white onion           or mushrooms, giving them a quick sauté and adding them to the meat.